Showing posts with label DIY. Show all posts

September 09, 2011

The Yo yo flower

Here is the Yo yo tutorial.
Materials needed:

  • Fabric
  • Matching thread
  • Needle
  • Button, beads, smaller yo yo to go in the middle
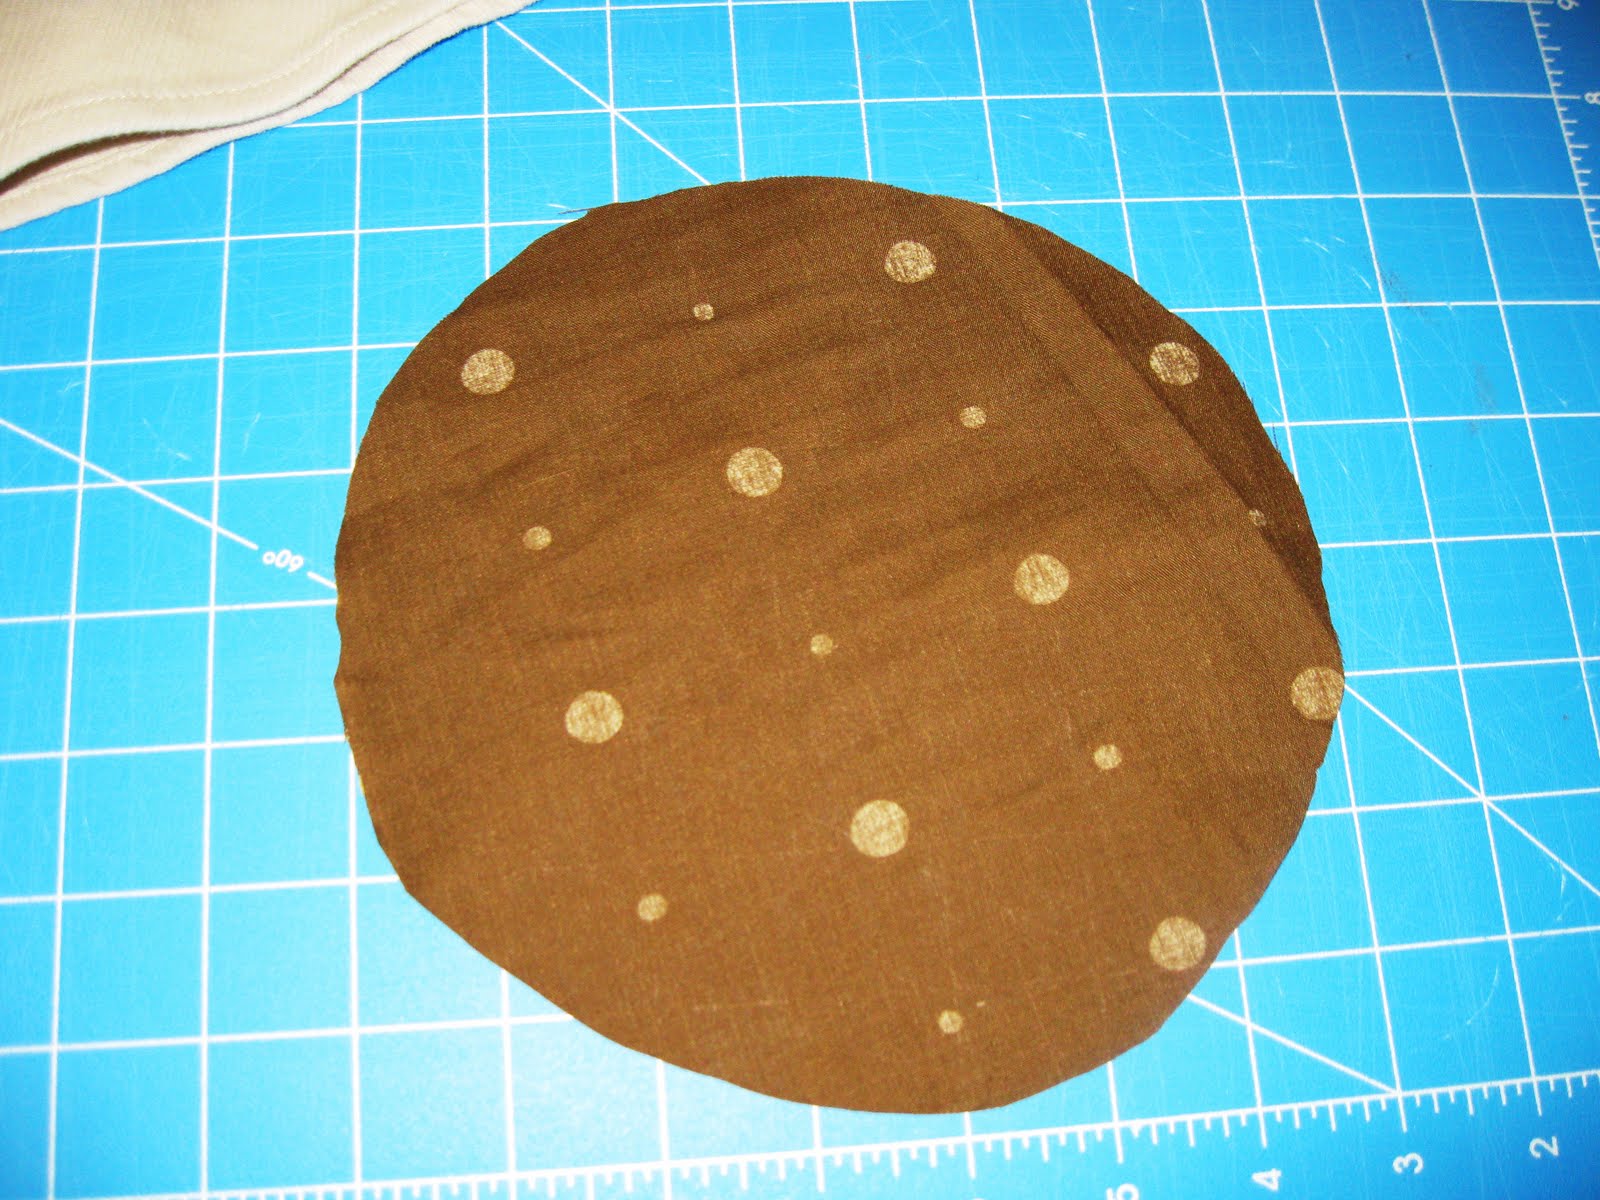
Start by cutting a circle out of your fabric. Keep in mind that your Yo yo will become about a 1/4 of the size of the original circle so make it bigger than you think:)

Take a part of the edge and fold it over about a 1/8 of the way in and begin stitching...like this:
Pull needle through and continue to fold and stitch all the way around.
Until it looks like this:

Now pull the thread tight and bunch the circle until it looks like this:
Now the right side is showing. Push the scrunched part to the middle of the circle and fluff it up a bit.

Secure the stitch on the back. Now you can either snip the thread and hot glue beads or whatever to the middle, leave it alone and put a clip on the back OR you can leave the thread attached and sew it onto a piece of clothing like I did to Amaree's skirt.
After I stitched it, I glued a button on top to give it some pizzazz. I also made a little Yo yo to put on a bobby pin for her hair:)

Now you are done!


Have a wonderful day!

September 03, 2011

Another fabric flower:)

Again please disregard the smudge on the pics:) Alright this tutorial is for an "open" ended round flower. (long title) Anyway here it goes!
You can use any kind of fabric for this one. Knit fabrics don't fray on the open ends whereas many other fabrics will. Thicker fabrics will require a bigger hand-sewing needle where thinner fabrics don't. Etc. It just comes down to what you want it to look like! This flower I used leftover muslin from making my temple skirt.

  • First cut 5 circles out of your fabric. (all the same size)

  • Now take one circle and fold it in half. Instead of basting a stitch on the opened end of the half circle, like in the rounded flower (Here)
Pull the thread so it looks like this:
Continue to do this to all 5 circles.

  • Sew the ends petals together. Make sure to secure at the bottom. Or you can always hot glue:)
  • You can add a large button, gem, pearls, or a smaller fabric flower in the middle. Then cut a circle of felt and hot glue to the back of the flower and add a brooch pin or alligator clip.


Have a wonderful day!

August 25, 2011

DIY Chandeliers

My mom mentioned the other day that she wanted a new chandelier in her kitchen. Hers is pretty but it isn't what she is looking for (it's outdated). So, me being obsessed with refashioning/repurposing I told her I would find some great ideas on how to either change it or replace it with a DIY chandelier.


Have a wonderful day!

August 24, 2011

Rounded Fabric Flower Tutorial

Alright here comes my next fabric flower. I don't know what to call it, so if you have any suggestions let me know;) This one is extremely easy.

  • Again start out by picking fabric of choice. 

*For this flower you can use ANY fabric you want. Just know the thicker the fabric, the harder to pull your needle through:)

  • Next cut at at least 5 circles out of your fabric. (I have done 6 or 7 before and it still looks just as cute.) You pick what size  you want the circles to be; they just need to all be the same size. One of my circles is slightly smaller than the rest, but it doesn't make that big of a difference in the end.

  • Now pick thread that matches/blends in with the fabric of choice. I used red here so it can be seen a little better through the pictures. Fold one circle in half. Start hand sewing the outside edge of the half circle like this:

  • Now pull the thread tight so it looks like this:
This is what each petal will look like.
  • Continue to do this to each circle until it looks like this:

  • Next attach the end petals together by stitching the outside edges together (do it at least 3 times and secure it in the back).
  • Now you can embellish the flower however you like! You can add a rolled rosette to the middle (tutorial coming soon), a cute button, beads, pearls, etc. This beauty about this flower is how versatile it can be. Another variation is the pointed fabric flower. I will also be creating a tutorial for this one.
After adorning my flower, I cut a felt circle and glued it on the bottom along with an alligator clip and brooch pin.


Have a wonderful day!


August 23, 2011

Burned rose tutorial

This is my first real tutorial so...keep it in mind:) This is for what I call the "Burned Rose" fabric flower.

  • First off pick your fabric of choice (silk blends/polyester burn the prettiest so use these). Once you have your fabric of choice start cutting! For this flower I cut a total of 14 rectangles, varying in sizes. 

This is the size of the first two rectangles.


All 14 rectangles decreasing in length and width.

  • Next comes the fun part...playing with fire. Keep your fingers as far away from the flames as possible (Trust me, I know from experience). The fabric will burn quickly so don't leave it in the fire for longer than 2 sec.


  • Continue to burn the rectangle until it looks like this: 

  • After you burn each rectangle, start stacking/placing them how you want. Some flowers I end up using all 14, others I want less petals so it's up to you if you want to use them all. As you stack them, criss-cross them/alternate like so:

  • Keep alternating until you are satisfied with the size and shape of your rose.

  • Now it's time to keep them together. If you're short for time just hand sew all the petals together at once, by going straight through the middle of the rose (up and down at least 3 times, then secure on the bottom) or you can sew each petal together to make it even more secure. I did the second option for the tutorial. I do two petals at a time:
Go up from the bottom then back down, add two more petals and repeat.

  • The end result will look like this:
 
Now you can either leave it the way it is or add some beads/pearls to the center to make it "fancy".
Also hot glue a circle of felt to the back to hide the sewing marks, then glue an alligator clip and/or a brooch pin (i think that's what they're called).
TA DA! You're all done! Now you can add it to a belt, your hair, a purse or whatever you feel like doing:)


August 21, 2011

For my mama

Alright, this post is specifically for mia madre. She is redecorating her whole upstairs (pretty much) and needed some ideas for artwork/decor for each room. I told her I would find awesome examples of DIY artwork that I would happily make for her:) I LOVE doing this type of thing!! So here it goes:
First up fabric flower artwork by Make it and Love it.

It is complete with tutorials on how to make each type of flower as well as how to put fabric inside the frames:) Incredibly easy and cute! Ashley has a million other ideas on her blog that are just as adorable. Go to  www.makeit-loveit.com to check out her tutorials:)
This next one is from lemontreecreations.blogspot.com. It is a simple wooden board with a quote. Very easy but I just love this one! 

iammommahearmeroar.blogspot.com
IMG_3004
Well that's it for now! I will post more awesome ideas another day. But for now enjoy these links. They are all incredible blogs that I love looking at to get ideas:)


Have a wonderful day!